Categories
Aircraft Models and Model Builds

Guillow’s Cessna 180 – part 4, sealing, sanding, covering and initial assembly

The sealing-and-sanding process can’t really be captured in photographs. All it involves is giving the frames a few coats of your chosen substance (a lot of modellers use cellulose dope, I use thinned PVA glue, as I’ve mentioned in previous builds), sanding between each coat, in an effort to seal the wood completely to stop it absorbing glue and water when covering takes place.

Once that’s complete, and dry, and sanded, it’s time to cover the whole damn thing. I often find the easiest place to start is the tail surfaces (they’re flat, so it’s a safe way to get back into the groove as it were).

However, this time things didn’t go entirely to plan, and I managed to warp the tail surfaces (a common problem in my models), so I had to take all the tissue off and start again. Luckily this isn’t a complicated, time-consuming process, so it was quickly done.

The wings were easier to cover and keep straight, though the shrinking of the tissue left a few wrinkles at the point where the ribs meet the leading edge (as you can see in the photo below).
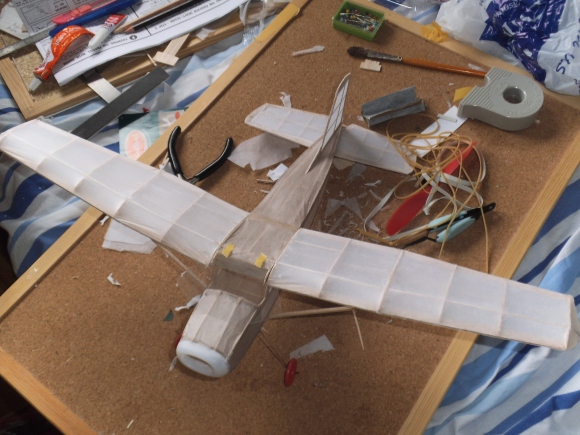
2013-05-20 16.32.44

The fuselage was also pretty easy, though the covering did reveal a problem with the very rear. One of the stringers was too low, which made the attachment of the vertical tail a challenge as the taut tissue was sitting a millimetre or two above the stringer to which the tail should be glued.

At this, the next problem arose: it looked as though the fuselage was twisted somehow. It turned out that it wasn’t, and I’d actually managed to attach the wings with unequal dihedral, which was easily solved when the wing struts were installed.

I think I have made more mistakes with this build than the previous two put together, which is very frustrating and a little dispiriting as this is meant to be a simple build to get kids into the hobby. On the positive side, I think I have solved all of the major problems and I’m starting to understand which issues are important and which are merely cosmetic. My main aim with this model is to get it to fly. If I can do that, I don’t really care how it looks. I want to learn how to build a flying model first and then work on making them prettier each time.
Categories
Aircraft Models and Model Builds

Guillow’s Cessna 180 – part 3, the tail surfaces and wings

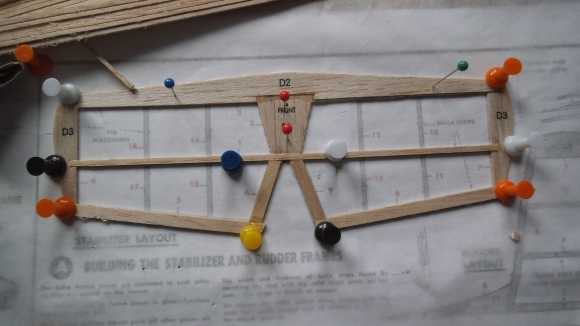
The next stage of the build is the tail surfaces. These are pretty simple (hence why I tackled them next) and yet they are also something I am keen to get right. With both the Hurricane and, to a lesser extent, the Mustang I managed to warp the tail surfaces, so I am determined to keep them flat this time around!

The tail wings are pretty basic and look quite sturdy:

2013-02-06 12.38.07

And when they’re finished and placed next to the equally strong-looking fin and rudder:

2013-03-21 18.04.00

The wings are always one of my favourite parts to build. I think they give an aeroplane its character, and stop it looking like a bizarre car. They’re often the easiest way to identify a plane too – a Spitfire’s elliptical wing is probably its most recognisable feature.

The wings on the Cessna 180 are fairly straightforward, though in the Group Build to which  I am constantly referring, it is suggested that there is a slightly complicated modification which significantly improves the strength of the wing. Essentially, it involves making a joint mid-way along the wing stronger by splicing the two pieces used together to provide a larger glueing area as well as other benefits which are beyond my novice’s comprehension.

That stage is pretty difficult to show properly, though it is shown very clearly in the Group Build thread (see part 1 for the link), so here is a picture of the nearly completed wings:

2013-03-21 14.58.03

At this point, I am further strengthening the leading and trailing edges by ‘laminating’ them with a strip of 1/16th” balsa along the entire length. This also helps rectify a small error in the plans which overestimates the width of the pieces used for the leading and trailing edges and so leaves the wing ribs with a slight overhang. Once the lamination is complete, the ribs and edges can be sanded flush for a neater finish.

After this, the whole of the model needs sanding and sealing in preparation for covering!

Categories
Aircraft Models and Model Builds

Guillow’s Cessna 180 – part 2, the fuselage

As I mentioned in part one, I am going to endeavour to make this build a little more stage-by-stage than the Mustang build was.

Nearly all model aeroplane builds begin with the fuselage to one extent or another. This isn’t the first stage on the plan, but it’s where the build starts in the Group Build (mentioned in part one) and I’m going to follow that as closely as possible.

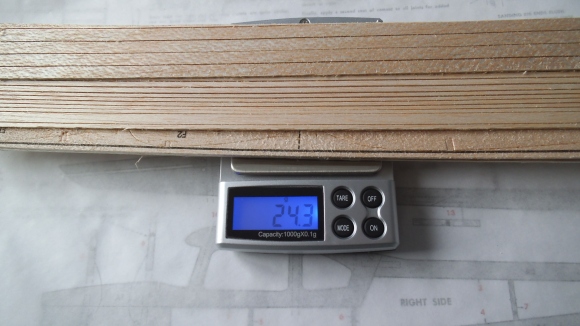
To start with, I weighed the wood sheets which contain the parts. Mine came out at just over 24g.

2013-01-22 13.10.18

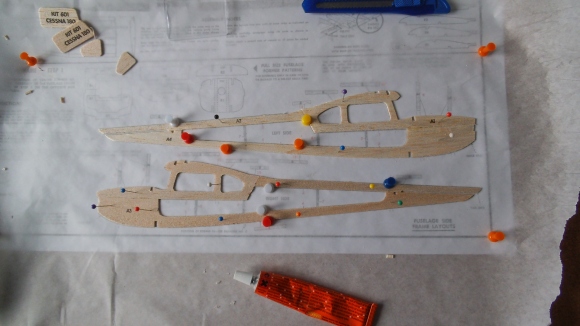
Then I started gluing the pieces for the fuselage together. This fuselage is built the same way as the Mustang (with the two sides built and structure going in between them) instead of the same as the Hurricane (keel and formers glued together and stringers attached to the outside).

Here are the fuselage sides as the glue dries.

2013-01-22 13.36.34

Here are the sides with the various braces added:

2013-01-24 15.09.16

As you may notice, the pins have changed position. This is because this is the moment I made my first minor mistake. I pinned and glued the major parts of the fuselage sides without thinking about the structural braces. This meant that in order to see the precise positions of several of the braces, I had to remove the sides from the plan. What I should have done was cut the braces to size and lay them out appropriately before I even thought about laying down the major parts.

The next step is to glue the tail end together and then attach some of the major fuselage formers. The key is to get the formers as square as possible to prevent the fuselage warping. I failed in this respect and had to break the tail end apart and reattach it.

2013-01-28 11.47.53

Even then, after adjusting the fit of the major parts several times, I am not convinced that I have got it perfectly square. A poor workman blames his tools, but I think the kit leaves a little to be desired in terms of fit and the quality of the wood used. One of my minor adjustments turned into an awkward and time-consuming repair as I ‘adjusted’ the piece into several smaller pieces. The joy of balsa modelling as opposed to plastic kits is that it is much, much easier to make a replacement or repair a broken piece.

I have also found the style of construction in the last two kits (the box fuselage instead of the former and stringer method of the Hurricane) less to my liking as I think the whole plane feels less sturdy this way. The next kit I build will definitely be a laser-cut kit which should make the engineering and fit of the parts much better and allow me to get on with getting the basics right in other areas, like the covering.

After a lot of fiddling, I eventually ended up with a fuselage with which I was grudgingly satisfied.

2013-01-28 11.48.22

Categories
Aircraft Models and Model Builds

Guillow’s Cessna 180 – part 1

My next balsa aeroplane is going to be a little different. So far I’ve built two World War 2 fighter planes with varying results. One looks quite nice but flies like a stone while the other looks terrible and is yet to be tested in the air.

A little reading about the models I’ve built and some basic aerodynamics has suggested that I’m going about this all wrong. Free flight planes fly slowly and need stability to avoid stalling/flipping/rolling and ultimately crashing. I’m trying to build flying models of planes which were designed to fly very fast and with an element of instability to make them manoeuvrable, when really I should start with something slow and stable like many of the private planes around today. Therefore, I am going to build the Guillow’s Cessna 180.

A real Cessna 180 in action

I have chosen this particular kit simply because, on the official Guillow’s forum, there has been a Cessna 180 ‘Group Build’ (where several people build their own version of the same kit simultaneously whilst discussing the problems they faced and their solutions) with the explicit intention to help newcomers such as myself to build a simple and straightforward kit which should fly reasonably well.

So here’s the kit:

Guillow's no. 601 Cessna 180
Guillow’s no. 601 Cessna 180

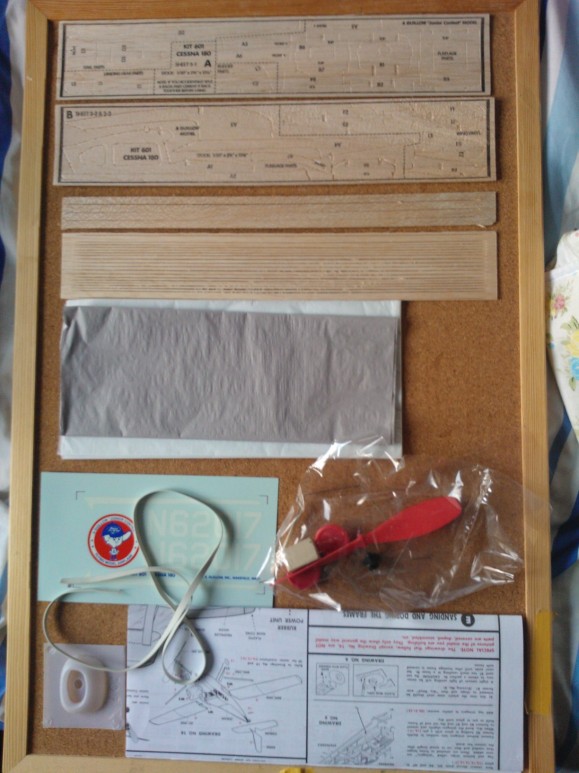
The contents of the box look like this:

All the pieces laid out on my building board

There are several things here which impressed and pleased me more than in the other kits (though this could be because the other kits were more sophisticated and designed for people who could do a lot of this for themselves…). Firstly, the undercarriage wire is pre-bent into the correct shape, there is a lump of clay for weighting the nose, the instructions are much clearer regarding the order of construction and the rubber looks better quality than the previous rubber bands supplied.

So, in the next few days I hope to make a start on this (and build a model that actually flies!) and I will attempt to keep a more coherent build log than the last one. I have also invested in a new digital camera which should improve the quality of the photos too.