Categories
Aircraft Models and Model Builds

Guillow’s Cessna 180 – part 4, sealing, sanding, covering and initial assembly

The sealing-and-sanding process can’t really be captured in photographs. All it involves is giving the frames a few coats of your chosen substance (a lot of modellers use cellulose dope, I use thinned PVA glue, as I’ve mentioned in previous builds), sanding between each coat, in an effort to seal the wood completely to stop it absorbing glue and water when covering takes place.

Once that’s complete, and dry, and sanded, it’s time to cover the whole damn thing. I often find the easiest place to start is the tail surfaces (they’re flat, so it’s a safe way to get back into the groove as it were).

However, this time things didn’t go entirely to plan, and I managed to warp the tail surfaces (a common problem in my models), so I had to take all the tissue off and start again. Luckily this isn’t a complicated, time-consuming process, so it was quickly done.

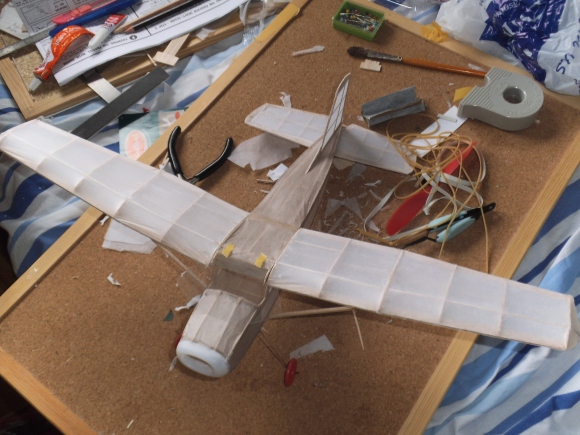
The wings were easier to cover and keep straight, though the shrinking of the tissue left a few wrinkles at the point where the ribs meet the leading edge (as you can see in the photo below).

2013-05-20 16.32.44

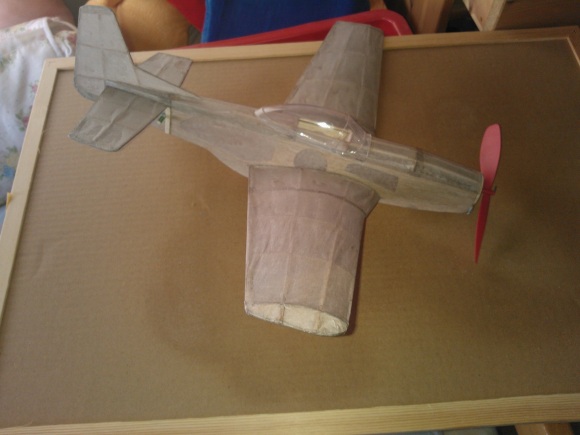
The fuselage was also pretty easy, though the covering did reveal a problem with the very rear. One of the stringers was too low, which made the attachment of the vertical tail a challenge as the taut tissue was sitting a millimetre or two above the stringer to which the tail should be glued.

At this, the next problem arose: it looked as though the fuselage was twisted somehow. It turned out that it wasn’t, and I’d actually managed to attach the wings with unequal dihedral, which was easily solved when the wing struts were installed.

I think I have made more mistakes with this build than the previous two put together, which is very frustrating and a little dispiriting as this is meant to be a simple build to get kids into the hobby. On the positive side, I think I have solved all of the major problems and I’m starting to understand which issues are important and which are merely cosmetic. My main aim with this model is to get it to fly. If I can do that, I don’t really care how it looks. I want to learn how to build a flying model first and then work on making them prettier each time.

Categories
Models and Model Builds

Balsa Wood Mustang, part 4

After some fairly ineffectual faffing about, I decided that the only sensible way to repair the minor damage to the tail would be to brace it with some scrap balsa on the outside of the fuselage, and take the undesirable weight gain on the chin. Below is a picture of my solution to the problem.

Obviously, this could incur some sort of weight penalty and negatively affect the flying performance of the model. However, recent browsing of the Guillow’s forum suggests that the 900 series models (of which which this is one) are designed very light anyway so adding a little extra weight isn’t a problem.

After that, all that remained was to ‘dope’ the wings, and put it all together!

Afterwards, it looked something like this:

WP_000259WP_000258

I’m rather pleased with the attachment of the canopy, even though it won’t be particularly clear from the photos. In the past, I have had problems with clear parts fogging up from glue fumes and was more than a little apprehensive this time. However, carefully tacking down the canopy in the corners with superglue and allowing it to dry before running a tiny amount down the edges seems to have worked a treat. Hopefully it’s all down to technique rather than good fortune!

Aside from that, it’s a pretty ugly model of a rather attractive aeroplane. As you can see, the covering on the wings isn’t as smooth as I was hoping and the glue has left dirty stains on the tissue covering. Hopefully, it will be a triumph of function over form.

At this point, it still needs a couple of fairings added to the wing roots, and I’m considering giving it a quick coat of silver acrylic paint. That may prove to be a disaster, but I won’t know until I try!

Categories
Models and Model Builds

Balsa Wood Mustang, part 3

During the covering of the wings, it became clear that the left wing was better built than the right. (There’s a point on the wing where there are two ribs side by side, and on the left wing they are identical, but on the right one rib rises a millimetre or so above the other towards the trailing edge of the wing.) Hopefully this won’t cause major problems. If it does, there is a solution – namely, strip off the tissue, sand level and re-cover.

After all of this came the shrinking stage. I had already been advised to leave the tail surfaces out of this and simply to seal them with the glue and water.

I shrank the fuselage, but unfortunately the tissue was quite slack in a couple of areas (due to some sloppy covering I expect) and so there are some wrinkles in the tissue even after shrinking.

At this point, things started to go slightly wrong.

Firstly, whilst sealing the tail surfaces, the tissue from either side stuck together. After posing the question on the Guillow’s forum, I was reassured that it won’t affect how the model flies, but it has left dark, translucent patches on the surfaces which mean that even before construction is completed, it looks grubby.

Secondly, after spraying the wings with water in the bathroom, I carried them back to Construction Central (also known as the spare room) pinned to my cork board. Watching the board carefully so as not to damage the wings, I sat down on the bed…. and also on the tail end of the fuselage. D’oh! Luckily, the fuselage itself was virtually undamaged, but I did manage to break the cocktail sticks I was using as a peg to hold the rubber band motor in place, and also weaken the mounting hole.

However, this was not the end of the problems. Reinforcing the hole with scrap balsa would potentially add too much weight behind the ideal centre of gravity, so I decided to drill myself a new hole a few millimetres away from the old one. I was smart enough to realise that the original hole was placed where it was to benefit from the nearby fuselage former so I decided to place my new hole in a similar position. However, despite measuring carefully, I clearly didn’t do it carefully enough. After drilling the new holes I inserted another cocktail stick only to find that it wasn’t level when viewed from above (one hole was nearer the tail than the other. The problem with this (I think) is that as the tension increased in the rubber band during winding, it would slip to the side nearer the nose and increase the stress on the wood on that side and probably tear a wider peg-mounting hole.

At this point, I feel as though more has gone wrong with this build than with the Hurricane. I’ve certainly made more mistakes. This is pretty frustrating considering that I had set myself the lower target of simply trying to make it fly, rather than look like a beautiful model. It will be quite an achievement to get it all completed and balanced at this rate!

Categories
Models and Model Builds

Balsa Wood Mustang, part 2

After a prolonged, enforced break caused by the wire provided for the undercarriage proving too hard to cut, the build is back up and running! A new pair of wire cutters were purchased and the main undercarriage cut to size.

However, after some thought, and reading some forum comments against including the undercarriage on a flying model, I decided against adding the wheels. All that unnecessary delay! However, in the intervening period I had done a fair bit of reading on the subject and so the time wasn’t completely wasted.

With no wheels to prepare, all that remained before covering and final assembly was the sealing of the wood with the 50/50 PVA/water mix used on the Hurricane.

Unfortunately the rudder sustained a small amount of damage during sanding and required some very basic repair work.

After that came the covering. First of all the tail plane:

Then the rudder:

Then I thought about getting a bit clever and attaching the wings part way through the covering process as leaving certain parts exposed would give me easier access to clamp the wings to the fuselage while the glue dried. However, posting this idea on the Guillow’s Model Builders’ forum (yes, they have their own dedicated forum!) was met with general disapproval. Apparently, the wings need to be fixed to a flat surface while they dry after the tissue is sprayed with water to shrink the tissue, otherwise there is a serious risk of the wings warping.

(At this point I should probably clarify that I have decided to use this model as a ‘proof of concept demonstrator’, that is, function is everything . Therefore, the undercarriage has been sacrificed to save weight, and decals will be omitted to reduce the need for preparatory coats on the model for much the same reason. Ultimately, the model may not look like much but it should work as well as it possibly can.)

So, I completely covered the fuselage:

And then made a start on the wings:

Once these are all covered, the tissue will be shrunk and then ‘doped’ (I’ll be using the usual PVA/water mix) before final assembly.

Categories
Aircraft Models and Model Builds

Free Flight

Here’s a brilliant example of a free-flight model plane: Click me!

This is the dream! Bear in mind that throughout the flight, the maker has no control over it whatsoever. As soon as he releases the model, it does its own thing, hence the name, ‘free flight’.